
Advanced Workspace Functionality
Sharing files and applications
TIP
Files, directories, applications and workflows stored in your workspace can be shared with other users of the EPISODES Platform in read-only or editable mode. This lets you work together with others on common data, applications and results.
Contents of this guide
With this guide you will learn how to share an item from your workspace with another user, how to manage and revoke the permissions you have granted, and what the person you shared with has to do to use the item. A short introduction to sharing can also be found in the My Workspace guide.
How to share an item
To share a workspace item, choose the Share action from its menu (the icon with three squares next to its name). The action is available for any item in your workspace - a file, a directory, an application or a workflow. Only the owner of an item can share it - people you share it with cannot share it further.
The action opens the Sharing settings window. Enter the e-mail address of the person you want to share with, choose the permission level and confirm with the Share button.
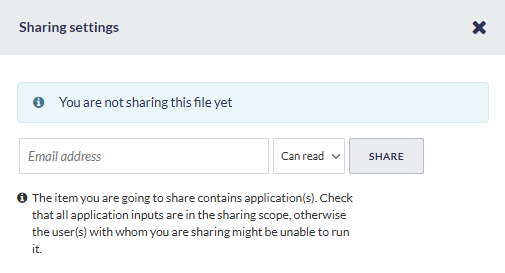
The e-mail address does not have to belong to a registered user. If it does not, the portal shows a note below the form, but the invitation is still sent - the person can use the shared item after registering an account with that e-mail address.
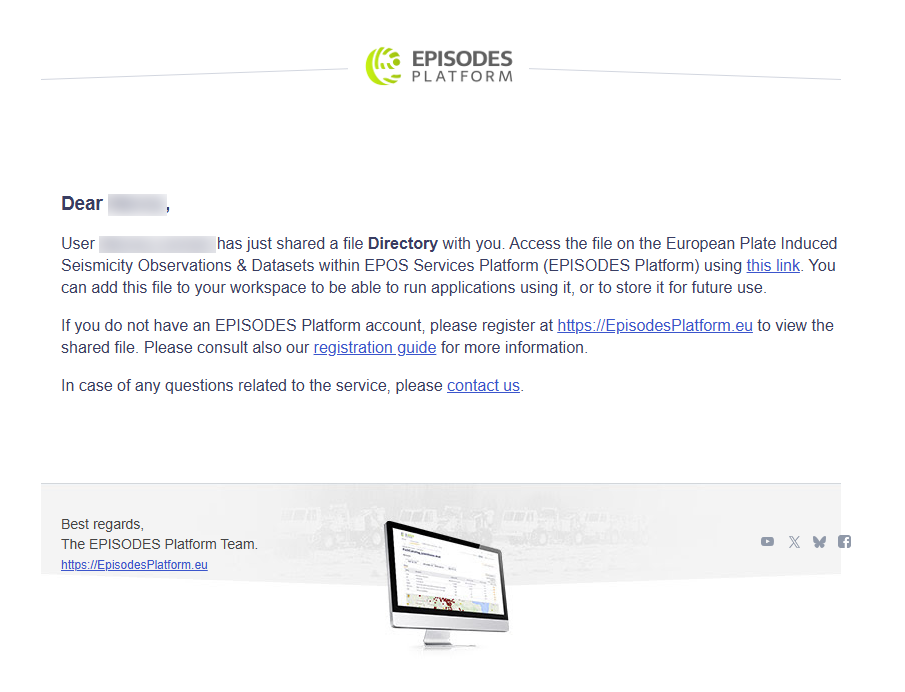
When you share the item, the person receives an e-mail with a link to it (see Using an item shared with you). If the e-mail cannot be sent, the portal tells you so and shows a link to the item that you can copy and send to the person yourself. The access is granted either way.
Items you share are marked in the workspace tree with an additional icon (tooltip: You are sharing this file with other users).
Permission levels
You can choose one of two permission levels:
- Can read - the person you are sharing with can view the item and its contents, but cannot change them. For a directory, this means they can neither manage its contents nor run the applications inside it.
- Can edit - the person you are sharing with can also modify the item, manage the contents of a shared directory and run the applications in it.
You can change the permission level at any time after sharing, and the person you are sharing with is informed of every change by e-mail.
Sharing applications and workflows
An application and a workflow are shared exactly the same way as described above. The person you are sharing with needs the Can edit level to be able to run the shared application.
Keep in mind that an application's input files may be stored outside of the directory you are sharing. If the item you are sharing contains applications, the portal reminds you to check that all their inputs are within the sharing scope - otherwise the other person will see the application but will not be able to run it. The easiest way to avoid this is usually to share a directory that contains both the applications and their input files.
Everything inside a shared directory is shared along with it. In the Sharing settings window of such a nested item, permissions coming from a parent directory are marked as Inherited and cannot be edited there. To change or revoke them, open the Sharing settings of the directory where the sharing was defined.
Managing and revoking sharing
The Sharing settings window also lists everyone the item is currently shared with. For each entry defined directly on this item, you can:
- change the permission level - using the list next to the e-mail address,
- resend the invitation - using the envelope icon, e.g. if the person did not receive the original message or lost it,
- revoke the sharing - using the bin icon.
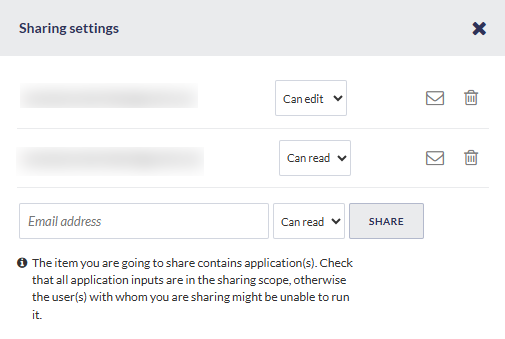
The person is also notified by e-mail when you revoke the sharing or change the permission level.
Revoking the sharing - as well as deleting, moving or renaming the shared item - affects the other user's workspace differently depending on how they added the item:
- if they added it as a link, the link breaks and they lose access to the item (see Broken links),
- if they added it as a copy, the copy belongs to them and is not affected.
Using an item shared with you
The invitation e-mail contains a link that opens the shared item in the portal. To view it, you have to be logged in to the account registered with the e-mail address the item was shared with.
The item is not added to your workspace automatically. To keep it, use the ACTIONS menu and add it either as a copy (Add to workspace) or as a link (Add to workspace as link).
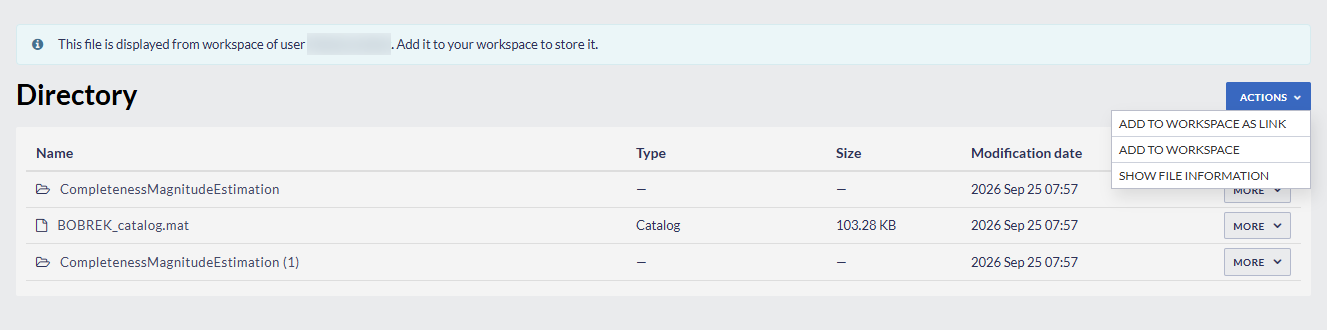
The two options differ in important ways:
- A link points to the item in the owner's workspace. You always see its current contents, it does not use your workspace storage space, and the permission level granted by the owner applies to it. If the owner revokes the sharing, moves, renames or deletes the item, the link breaks, and the item becomes inaccessible.
- A copy is an independent item in your workspace. It keeps the contents as they were at the moment of copying, counts towards your workspace storage space, and is not affected by later changes to the sharing settings.
Links to items shared with you work like any other workspace link - see the Creating links in workspace guide for details.
The File information panel of such an item shows that it has been shared with you, together with the name of its owner.